Firebase Authentication
-
Description
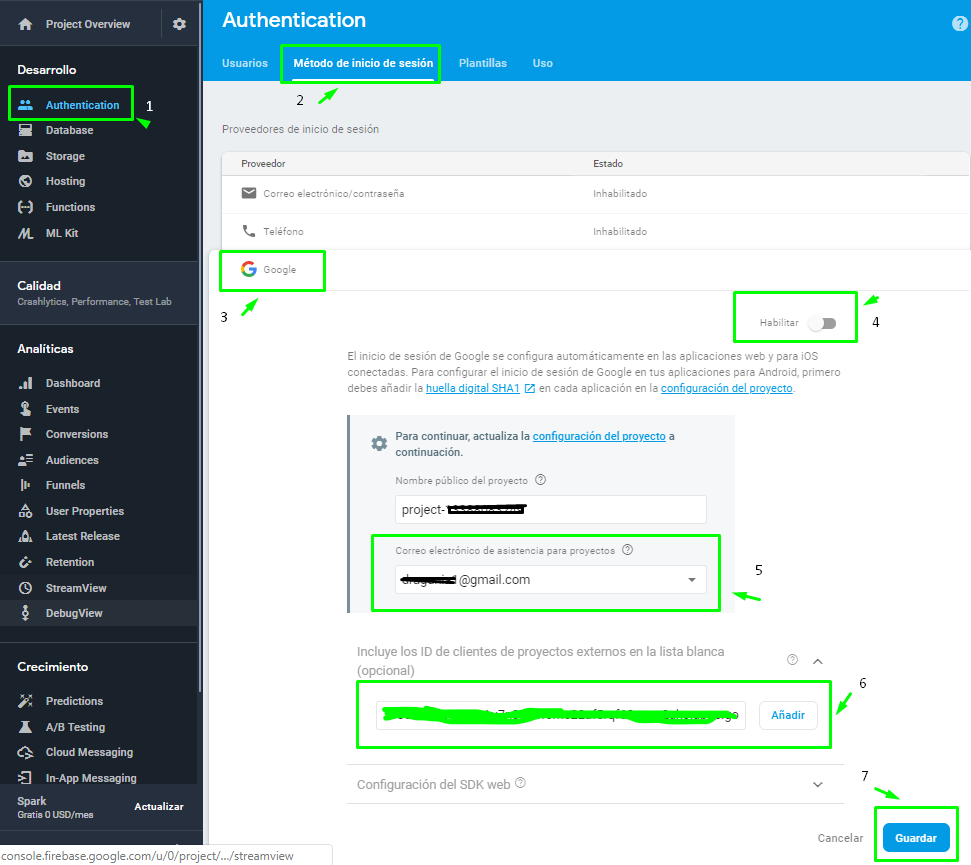
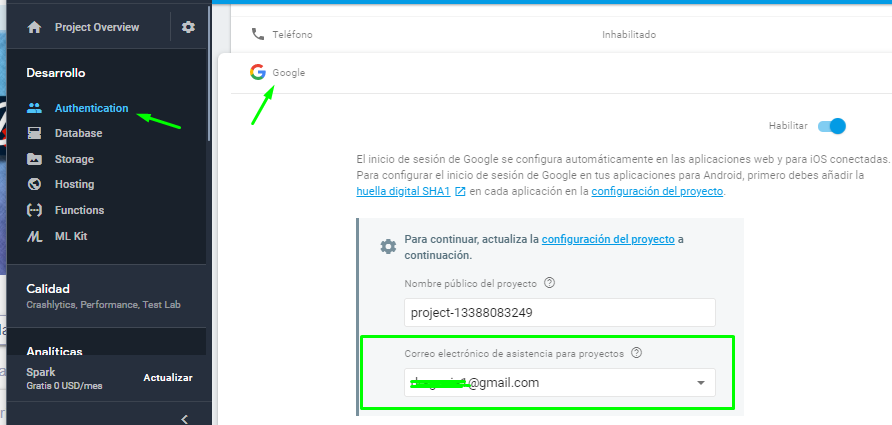
- 1- We go to the authentication section of our project.
- 2- Sing-in method.
- 3- We chose Google, in this case. We can activate as many as we want, but currently you can only use Google.
- 4- Enable it.
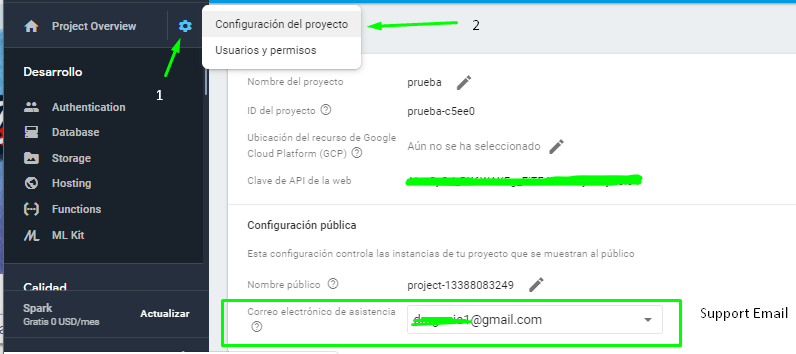
- 5- Add a contact email, this will avoid future errors (12500).
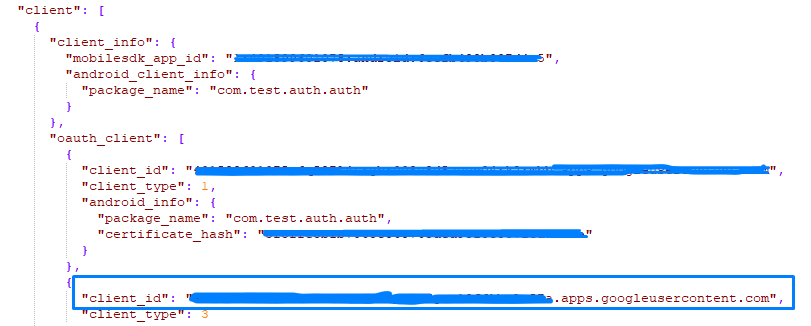
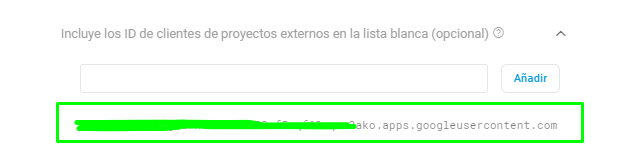
- 6- We add the "Client id", if we don't we will get an error 10. To get the "Client id" we must open our previously downloaded JSON file.
- 7- We save our data.
Firebase Authentication
Most of the apps need to identify users. To know the identity of a user allows an app to save your data in the cloud secure and provide the same personalized experience on all devices of the user. Firebase Authentication provides services already prepared to authenticate users in your application. It supports authentication using passwords, phone numbers, suppliers of identity federated popular, such as Google, Facebook and Twitter, and much more.
To be able to use this component the first thing we need to do is register in Firebase and create a new project. Once created we have to select android.
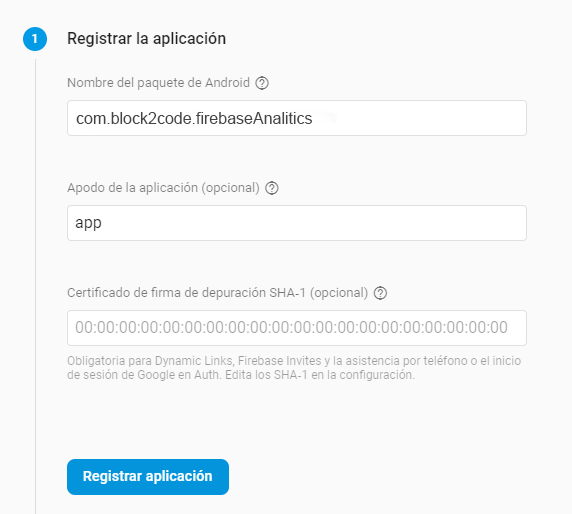
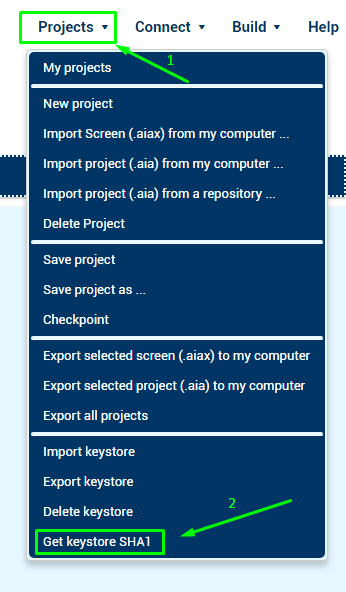
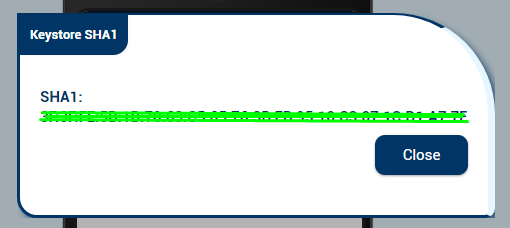
You must provide the name of our package and the SHA1, we'll get it in the next step (Mandatory). We can also put a nickname, although this is optional. Once we have filled the fields, click Register application.
To get the SHA1, we must have performed a build satisfactory of our application, if we comply with this requirement we will click in the next button within the builder
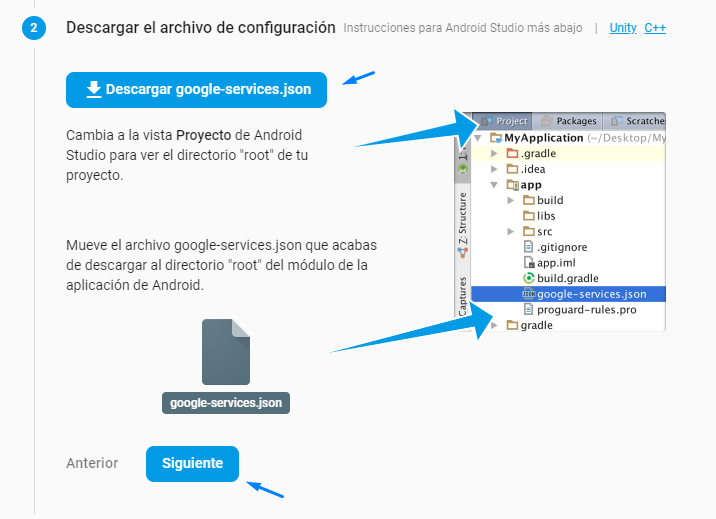
The next step is to provide us with the JSON file (google-serviceS.json), which we will need it to use the component. We download it and click next.
In step 3, they explains us how to add the Firebase SDK. But we don't need it, Block2Code has it already built-in!, so we click next.
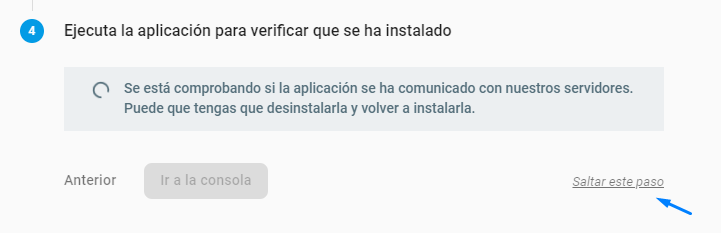
In step 4, Firebase tries to check if the application has been setup correctly, simply we omit this step.
Finally we must enable the access methods that we will use, in the example we will use Google.
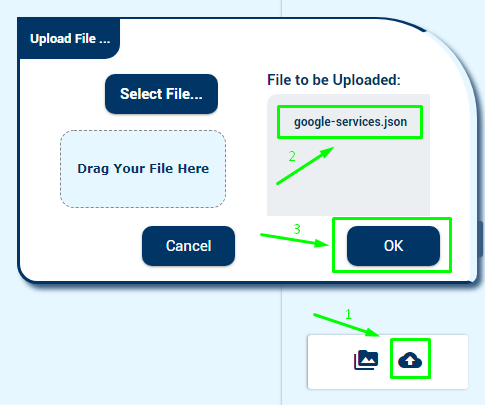
Now only remains to add the component to our application and upload the JSON that we downloaded previously.
And you're done! We added Firebase Authentication to our application.
-
Frequent errors
- Error 10
-
- Check that SHA1 is correct.
- Make sure you have entered the "Client id".
- Check that SHA1 is correct.
- Error 12500
-
- Check that you have the support email configured.
- Or in Authentication > Sing-in Methods > Google
- Check that you have the Oauth Consent Screen configured. To view it, go to the
Google console
and select your project. Once selected go to credentials > Oauth consent screen and configure it.
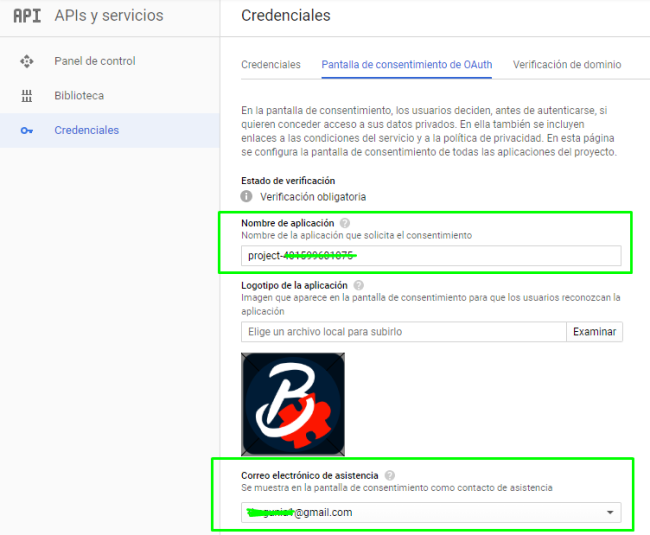
- Check that you have the support email configured.
-
Procedures
- Start Google Login

- This method allows us to show the user a Google login dialog.
- Logout

- This method allows us to close the user's session, regardless the provider of authentication used.
-
Events
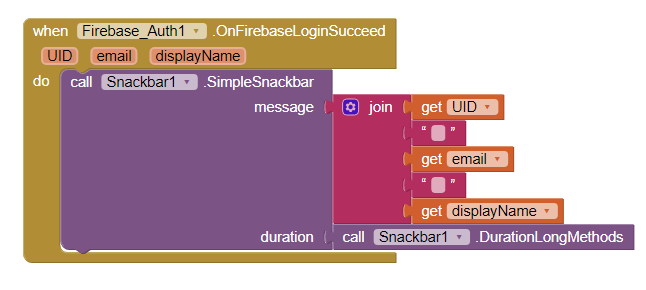
- On Firebase login succeed
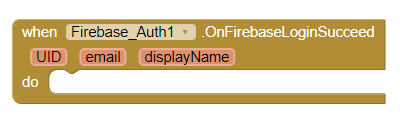
- This method notifies us when the login is successfull.
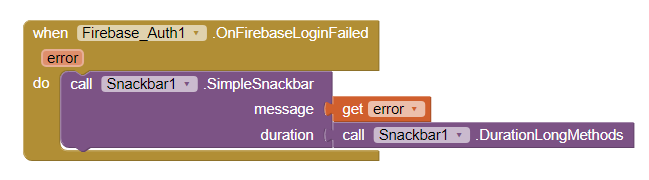
- On Firebase login failed
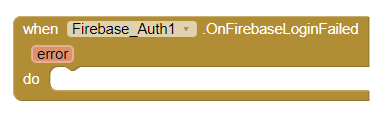
- This method notifies us when the login has failed.
- On Firebase logout
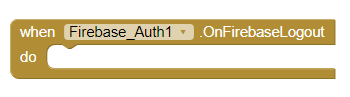
- This method notifies us when the user has logout successfully.
-
Example
- Adding Firebase Authentication
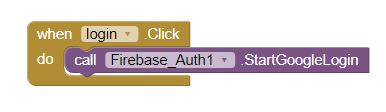
- We simply call for example from a button the method Start Google Login and it will show the login with Google. Keep in mind that we need to have the file "google-services.json" uploaded to the project, and that there can only be one in the whole project at the same time.
-
- To know at any time the status of the login we can use the events
- To know if the login has been satisfactory
-
- To know if the login has failed
-
- To know if the user has closed session
-

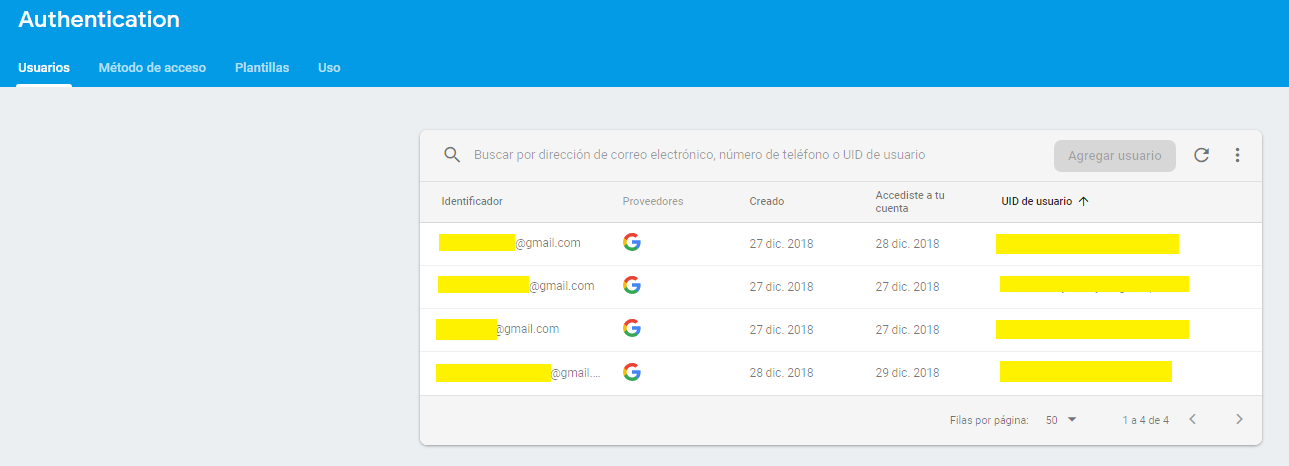
And voila! We now have Firebase Authentication added to our application. If we check the list of users in the Firebase Authenticatio paneln, it will show the users.-